





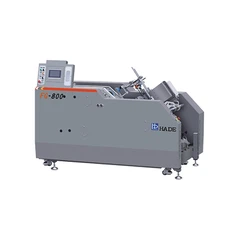
As a seasoned supplier of glue - spraying systems, I understand the critical role that proper spraying pressure plays in the overall performance of these systems. Incorrect spraying pressure can lead to a host of problems, from uneven glue application to excessive waste. In this blog post, I'll share some valuable insights on how to adjust the spraying pressure of a glue - spraying system effectively.
Understanding the Basics of Spraying Pressure
Before delving into the adjustment process, it's essential to understand what spraying pressure is and why it matters. Spraying pressure refers to the force with which the glue is expelled from the spray nozzle. It directly affects the pattern, droplet size, and coverage of the glue on the substrate.


A too - low pressure may result in large droplets, uneven coverage, and insufficient adhesion. On the other hand, excessive pressure can cause over - spraying, misting, and even damage to the substrate. Therefore, finding the optimal spraying pressure is crucial for achieving high - quality glue application.
Factors Affecting Spraying Pressure
Several factors can influence the required spraying pressure of a glue - spraying system:
Glue Viscosity
Glue viscosity is one of the most significant factors. High - viscosity glues require higher pressure to flow through the nozzle smoothly. For example, a thick, heavy - duty glue used in woodworking will need more force to be sprayed evenly compared to a low - viscosity glue used for light - weight paper bonding.
Nozzle Size and Type
The size and type of the spray nozzle also play a vital role. Smaller nozzles generally require higher pressure to maintain an adequate flow rate. Different nozzle designs, such as fan - shaped or circular nozzles, may also have different pressure requirements to achieve the desired spray pattern.
Substrate Material
The nature of the substrate affects the spraying pressure. Porous substrates may absorb the glue more readily, so a lower pressure might be sufficient. In contrast, non - porous or smooth substrates may need higher pressure to ensure proper adhesion and coverage.
Steps to Adjust the Spraying Pressure
Step 1: Consult the Manufacturer's Guidelines
The first step in adjusting the spraying pressure is to refer to the manufacturer's guidelines for your specific glue - spraying system. These guidelines usually provide a recommended pressure range based on the type of glue, nozzle size, and typical applications. This is a great starting point to ensure that you are within a safe and effective pressure range.
Step 2: Set Up the Testing Environment
Prepare a test substrate that is similar to the actual material you will be working with. This could be a scrap piece of wood, cardboard, or plastic. Set up the glue - spraying system in a well - ventilated area and make sure all safety precautions are in place.
Step 3: Start with a Low Pressure
Begin by setting the pressure at the lower end of the recommended range. This helps to prevent over - spraying and allows you to gradually increase the pressure until you achieve the desired results. Turn on the glue - spraying system and start spraying the test substrate.
Step 4: Observe the Spray Pattern
Pay close attention to the spray pattern on the test substrate. Look for signs of uneven coverage, large droplets, or excessive misting. If the glue is not spreading evenly or is forming large blobs, it may indicate that the pressure is too low.
Step 5: Gradually Increase the Pressure
If the initial spray pattern is not satisfactory, gradually increase the pressure in small increments. After each adjustment, spray another section of the test substrate and observe the changes in the spray pattern. Keep increasing the pressure until you achieve an even, consistent spray pattern with no signs of over - spraying or misting.
Step 6: Check for Adhesion
In addition to the spray pattern, it's important to check the adhesion of the glue to the substrate. After the glue has dried, try to peel or scrape it off gently. If the glue does not adhere well, it may be necessary to increase the pressure slightly to ensure better penetration and bonding.
Step 7: Fine - Tune the Pressure
Once you have achieved a satisfactory spray pattern and adhesion, fine - tune the pressure to optimize the performance. Make small adjustments up or down to find the exact pressure that provides the best results for your specific application.
Using Additional Equipment for Precise Pressure Adjustment
Some advanced glue - spraying systems come with built - in pressure gauges and regulators that allow for precise pressure adjustment. These tools can be extremely helpful in achieving accurate and consistent spraying pressure.
In addition, there are other corollary equipment that can work in tandem with the glue - spraying system to enhance the overall performance. For instance, the Automatic Box Stacker can be used to handle the substrates efficiently after the glue has been applied. The Grinder Used On Folder Gluer can prepare the substrate surface for better glue adhesion, and the Surface Treatment Equipment can improve the bonding properties of the substrate.
Troubleshooting Common Pressure - Related Issues
Even after careful adjustment, you may encounter some pressure - related issues. Here are some common problems and their solutions:
Over - Spraying
If you notice excessive glue being sprayed outside the desired area, it could be due to high pressure. Reduce the pressure gradually until the over - spraying stops. Also, check the nozzle for any blockages or damage that may be causing an irregular spray pattern.
Uneven Coverage
Uneven coverage can be caused by a variety of factors, including low pressure, clogged nozzles, or improper nozzle alignment. First, increase the pressure slightly to see if it improves the coverage. If not, clean or replace the nozzle and make sure it is properly aligned.
Poor Adhesion
Poor adhesion may be a result of insufficient pressure, incorrect glue type, or a dirty substrate. Increase the pressure to ensure better penetration of the glue into the substrate. Also, make sure you are using the right type of glue for the material and clean the substrate surface thoroughly before applying the glue.
Conclusion
Adjusting the spraying pressure of a glue - spraying system is a crucial process that requires careful attention to detail. By understanding the factors that affect spraying pressure, following the proper adjustment steps, and troubleshooting common issues, you can achieve optimal performance and high - quality glue application.
If you are in the market for a reliable glue - spraying system or need further assistance with pressure adjustment and other related issues, we are here to help. Our team of experts has extensive experience in the field and can provide you with customized solutions to meet your specific needs. Contact us to start a procurement discussion and take your glue - spraying operations to the next level.
References
- "Industrial Adhesive Application Systems: Principles and Practices" by John Smith
- "Glue Technology Handbook" edited by Jane Doe
- Manufacturer's manuals of various glue - spraying systems